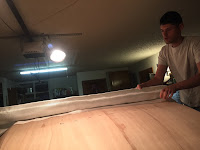
The project requires two layers of fiberglass on the top and one layer on each side. This is the largest application of fiberglass we have attempted so far. First, some prep work to protect areas we don't want to get epoxy on. We laid down a drop cloth inside and covered the quarter panels with plastic sheeting to prevent epoxy runs down the back.
 |
| Plastic drop cloth inside the shell |
 |
| Protecting the quarter panels from what will become the hatch panel |
 |
| Finally, the cats prove useful...In order to reach the lower panels during sanding, we raised the shell onto the boxes of kitty litter. |
We carefully unwrapped the fiberglass and rolled it over the camper leaving two inches on the edges to , careful not to have any snags in the fabric.

Once we had the first layer out and over the camper, we have to smooth out the fabric. The aim is to get the fabric flat before we add the epoxy so it bonds easily without us having to tug and pull it. Luckily, Andi knows about fabric and how to manipulate the weave - a little education in fashion studies has unexpected benefits! Who knew? :)
 |
| Adding a second layer on top of the first |
Two layers of fiberglass on and pulled tight and smoothed flat. Ready for epoxy goop.
The edges of the first two layers run to about the mid-point of the quarter panels, and are feathered due to the cut of the cloth. These will have to be sanded into a smooth edge before we lay the side cloth on top. The sides will overlap the first two layers onto the top panel by about two inches, making a triple reinforced strip running the length of the camper from front to back. This reinforced strip gives enormous strength to the camper and is where the add-on roof rack system can be installed.
Once all the layers are on and dried, a good light sanding all around is necessary to remove any small epoxy "pimples" - little sharp spots of excesses of epoxy that dried rough relative to the surrounding area. Then we add two more coats of epoxy to fill in the remaining weave and tip out any air bubbles to leave a exceptionally smooth finish. Can't wait!


Hi Andrew. What happened to your project - I have reached this step in my build, and finally got through all the standing on the second coat. What do I do next? JK - I have the manual of course, but enjoy seeing the road ahead...
ReplyDeleteHi Scott...did my husband reply to your comment? He mentioned he saw it but I don't see a response. We have a wonderful friend who kept up with his blog posts AND has completed the project. Link: http://myclcteardropcamper.blogspot.com
DeleteHow did your build go after this entry? I loved reading your blog--very inspirational, but would just love to know if you got out camping this summer! BTW--no problem with slow (it took us 10 years to restore an old airstream). Good luck!
ReplyDeleteI'm glad you enjoyed reading it! It was fun to share our progress. Unfortunately, work and camper schedules became exhausting, and keeping up the blog was too much added work. Blogger also isn't very user friendly when adding pictures.
DeleteWe did finish the build around seven months after the start of this blog. We took it on several small local trips and were able to take it on a 860 mile road trip to South Dakota. While it became operational, it is one of those projects that is never *truly* complete... We still have some electrical work for added comfort.