Now to start the largest (and heaviest) part of the project to date: the floor. It is about four times as thick as any other wood piece thus far.
It is also so big we had to expand our work area by laying down more cardboard and plastic sheeting.
Naturally, the surface area of the floor is larger than can be shipped
in one piece, so we have to glue two pieces with more Cell-o-fill and and secure them together
with the aid of screws through what is known as a "butt block". Ideally, the screws will come out after the glue hardens, but we will see... Here the floor is assembled and left to cure for 24 hours.
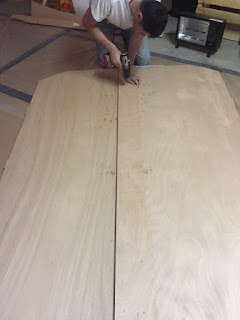 |
| Securing the butt block with screws. |
 |
| Butt block weighed down to aid the curing glue |
The next step is to cover the sleeping area with epoxy, same as the galley flat. According to the manual, we should leave a two inch margin along the edges. This will help ensure the strongest possible bond to the shell when we add a fillet. We used masking tape. Cool.

We rolled the epoxy on with paint rollers, then sanded. Then another layer of epoxy, followed by more sanding. Then the final layer we tipped out the bubbles with a brush. The whole process took about three days to allow the epoxy layers to harden enough to sand and wipe clean before applying the next layer.
While curing each layer, we had to protect it by covering it with
plastic sheeting. Here, the Crisis Manager inspects our work...

The picture on the left is after the second coat, the one on the right is the final product. Smooth and very nice! Go us!


No comments:
Post a Comment