Just like the last post, this entry covers several days worth of work although it all covers one step. Here, we join two side panels along each side to the roof panels to form a (generally) three-sided structure. Below is the step from the book:


Here is an close view of the copper wire which are used to make the stitches (and the twisted stitch). These are inserted into factory drilled holes and then twisted to hold the form to the mold or connect two panels to a seam.


This twisting technique was used to attach the side panels to the roof panels below. Each side is two separate panels. Each panel is stitched to the mold frame and to each other. The same technique we used in the last post will be used here. More peanut butter epoxy layered with fiberglass and more epoxy! Below you can see the panels stitched into the mold, but we still have some work to attach them to each other.


OK, the first real snag... We have three panels meeting at an extreme awkward angle which all have to connect. Until this point, all the panels have fit snugly with no problems. As you can see, there is a significant gap between the panels which needs a solution. Unfortunately, the manual (affectionately referred to as the "hymnal") does not mention anything about this contingency.
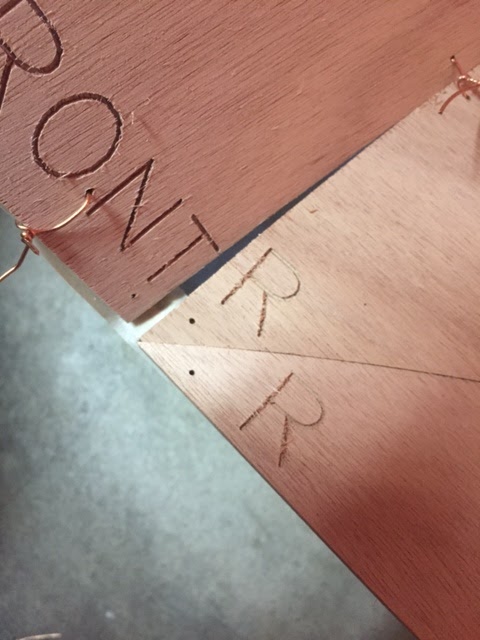
After considering using the wood flour fillet to bridge the gap, we had the bright idea to shim the panels to hold the connection while we tack welded the seams (we credit our Crisis Manager keeping us cool).
 | |||||
| "Bro, use the extra cardboard in the corner to shim the panels. Keep it together, man! |
 |
| Brilliant! |
More sanding of the tack-welds and adding fiberglass along the seams...

 |
| "I told you it would work." |
Finished this step. All pieces are in place and fiberglass has hardened with no gaps in any seams. Nice work! You may notice two pieces of blue painter's tape marking the end some fiberglass work. These mark the place with the shell will open (like a hatchback on a car) to provide access to the galley. It may be hard to conceptualize from the photo.


No comments:
Post a Comment